Monday, November 29, 2010

Turkey Time

As far as cakes go, Thanksgiving week felt a little bit crazy.  Okay, so I only baked three cakes, but I put so much time into these things that I felt super busy all week. 

*ahem*  But without further ado, meet Edgar the Turkey!


Edgar may appear stoic, but he is sad for two reasons: 1. He's upset that I have nothing but a camera phone to "capture his glory". (He's a very arrogant turkey, you see.) and 2. His decapitated head is now chillin' in my freezer. (Pun intended.)

Anywhoooo....

The concept of Edgar began the week before Thanksgiving, as I was announcing to my bestie, Janey, that I was going to make a "pumpkin flavored pumpkin cake" for my mom's Thanksgiving.  To this, Janey replied, "Or how about a turkey flavored turkey cake!"  She was kidding...hooopefully ;)... but when my dad requested a Thanksgiving cake as well, I picked up the idea, minus the turkey flavoring of course. :P


This cake is made mostly out of chocolate cake (the box mix kind, because I'm fancy like that), Scotcheroos, buttercream, and fondant.    I formed the middle part of his body by baking in a 10" round pan, cutting the cake in half, stacking the two halves, and then placing them flat side down.  I used a Bake and Fill pan that I picked up at Goodwill to bake the front part of his body, but I think the same shape could be achieved from smaller round pans cut in half and stacked. 


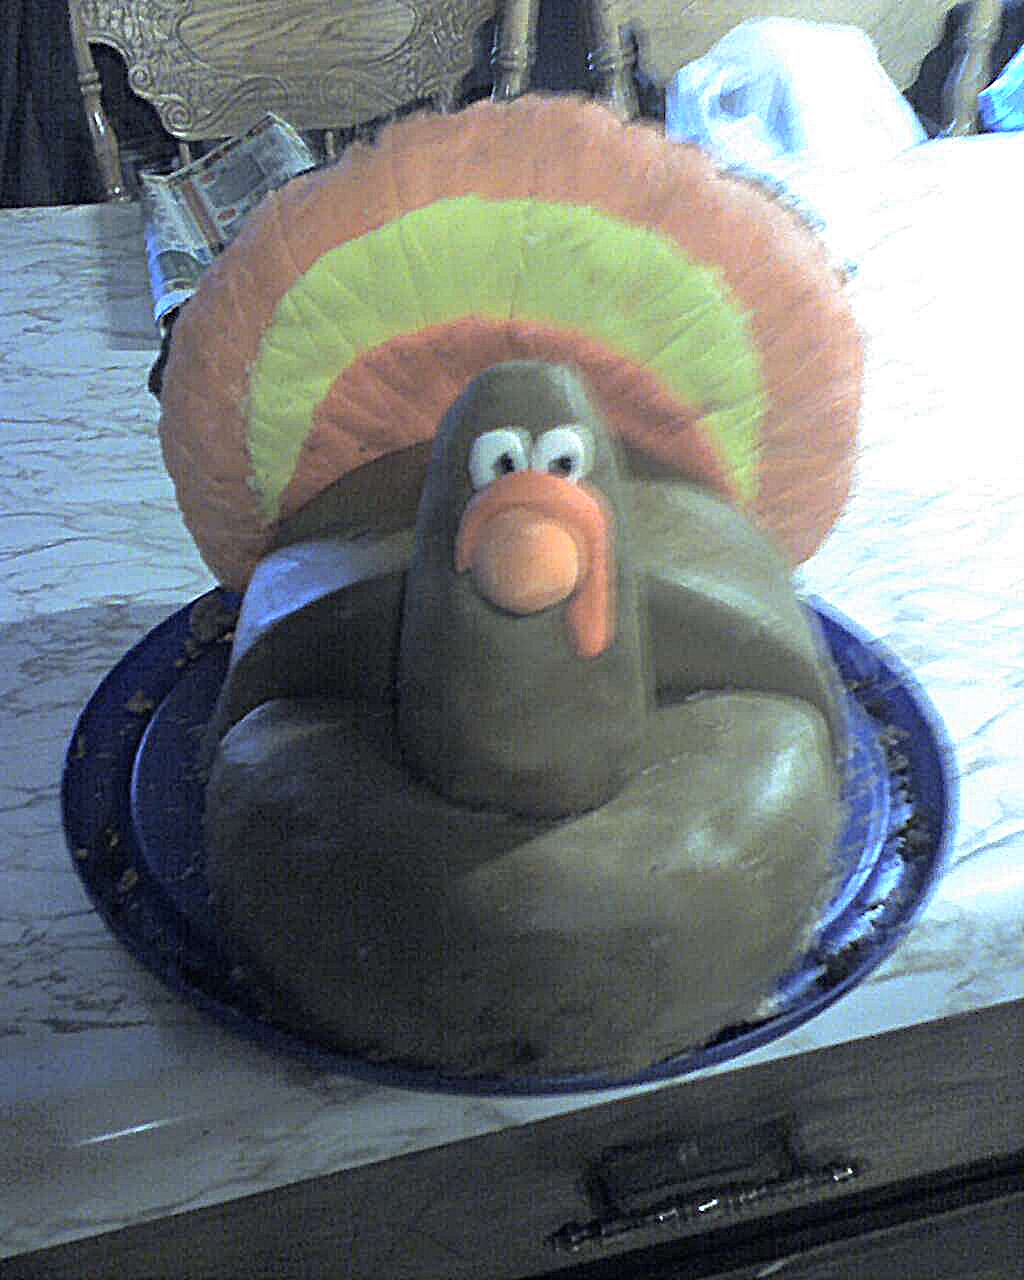
 His tail-feathers were made out of Scotcheroos, that I pushed into half a saucepan to get the curved shape.  (I think chocolate covered rice krispies would have worked just as well.)  Lastly, his head is made out of an ice cream sugar cone for support and Scotcheroos (minus the chocolate) to give it shape.

It is all covered in fondant and I used the buttercream to coat and paste pieces together.

If you'd like any more directions on how to make yourself an Edgar, feel free to email me.  Also, I'll be happy to share the recipes I used, if you don't feel like waiting for me to post them in a later entry.

Hope everyone had a happy thanksgiving :)
<3 Rachel


Sunday, November 28, 2010

The Cake That Started It All

I've been on Deviant Art for about a year now, and I find it pretty amusing that one of my most popular cakes is still this here Oreo Cake:


The amusing part is it's pretty much the first cake I've ever really taken seriously.  I'm still impressed with it, considering how little I knew about baking at the time, but I think I've done better work since.  For some reason though, "Oreo Cake" is still getting a lot of attention. 

I thought this would make a really good first entry since its probably the easiest cake I've done and I've had a few people ask how to get the finished product. (Not to mention, I learned a few reaaally helpful things while baking this.)  I think I'll do this in the form of a lovely little story:

Once upon a time...

(It's a meeee!)

...there was a silly girl named Rachel who happened to have a crush on an even sillier boy named Steve.  It was the middle of a lovely summer, and Steve and his friend J.'s hair was getting a little too long for Rachel's tastes.  In a half joking tone, Rachel said she would reward the two boys with cakes if they committed themselves to getting haircuts. They accepted and soon Rachel found herself with two cakes to bake.  J, not being a fan of frosting, requested a pineapple upside down cake.  

(My buddy/assistant chef Holly!)

Steve, on the other hand, certainly did not have an aversion to frosting. In fact, he loved it!  (And still loves it for that matter. :P)   Baking for such a fan of sweets, Rachel took the second cake very very seriously.  Here's a few of the things she discovered in preparation for his cake:

  1. To avoid getting a really lumpy cake.  Don't over-mix the batter.  Also, setting the cake on a piece of aluminum foil in the oven will help distribute the heat beneath it more evenly.
  2. Leveling the two layers before stacking makes a much more presentable cake.  Use a big bread knife or thread pulled tightly to cut off any lumps. Then stack the layers with the cut side facing the middle.
  3. Adding dry pudding mix to a box cake makes the finished product much more moist.
Most of what she found was probably pretty common knowledge, but Rachel had never heard these things before; They certainly did make a difference.   

So Rachel invited here two best buds over, Janey and Holly, and they began to bake.  To make the Oreo Cake, they simply used a chocolate box mix, followed the instructions, and added a box of chocolate pudding mix.  Rachel applied the above information to bake and assemble the cake, and then very carefully covered it in plain ole' store bought vanilla frosting.  She tore apart a few oreos and lined them up on the sides of the cake, and then commissioned her friends to do some oreo smashing in plastic bags: 


Rachel sprinkled the crushed Oreo on top of the cake, and wa-lah! The Oreo Cake was done!

And  a month (and a bit of drama) later, Rachel and Steve were happily dating.  And still are. :)  Oh, and Rachel kinda sorta loooves to bake now.


The End


See! Wasn't that nice?  Like I said, super easy, since none of it's really from scratch.  But in the end, you still have yourself a pretty impressive little cake.

Try it yourself and enjoy!

-Rachel :)

Welcome!

Well hello there!

Somehow you have happened upon my brand new blog! As you can tell by my excess number of exclamation marks, I am pretty darn excited! :P

So, what is rachie--cakes.blogspot.com, you may ask?  Well, I'm not entirely sure yet (But I am totally peeved that my web address needed two hyphens. All the other rachie cakes on this blogspot don't even bake and stopped posting years ago! gggrrrrr)

But anyway, to somewhat answer the above question that my pretend-ideal-reader has just asked me in my mind:  It shall be a baking blog! :)  And anything beyond that, we'll just have to see...

In the last year, I've gotten very very much into baking, primarily cakes.  And now that I have a commissioned wedding cake looming in the future, I need to practice practice practice!  So I plan on baking almost every weekend.  I thought it would be fun to blog my trials and tribulations, drop a few awesome recipes here and there, and let anyone who stumbles along know any new tips and tricks I figure out.  I got a little experience behind my back, but I can't say its much. So hurray for new learning experiences! ;)

And as I am with any new idea, I'm dreaming big. :P   It would be pretty awesome to start making youtube videos, modify some recipes of my own, and make a whole bunch of new friends on here.

So thanks for checking out Rachie Cakes! Check back soon, or be one of my first followers! Com'mon, you know you wanna. ;)

<33 Rachel!